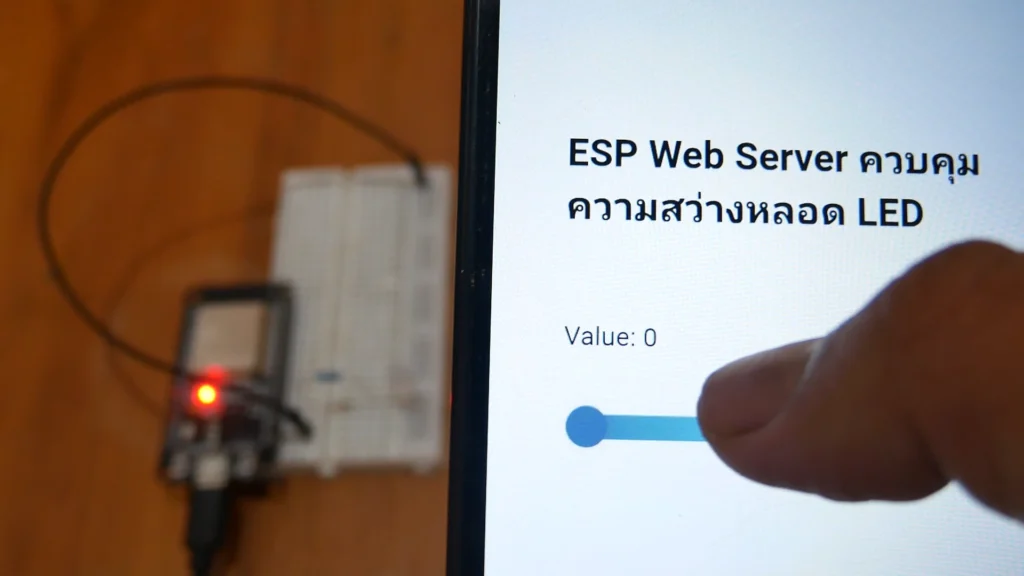

ESP32 Web Server – ควบคุมดิจิตอลเอาพุตผ่าน WiFi
การสื่อสารจากอุปกรณ์อื่น เช่น โทรศัพท์หรือคอมพิวเตอร์ ไปยัง ESP32
สามารถทำได้ผ่านคำขอ HTTP โดยไม่ต้องเชื่อมต่ออินเทอร์เน็ต
เมื่ออุปกรณ์เชื่อม WiFi เดียวกัน จะสามารถส่งคำสั่งแบบ HTTP GET ไปยัง Web Server ที่อยู่ใน ESP32
เพื่อควบคุมอุปกรณ์ต่าง ๆ เช่น การเปิด/ปิด หลอดไฟ LED
✅ หากคุณต้องการเข้าใจโครงสร้าง Web Server แบบมือโปร แนะนำอ่านบทความแม่:
ESP32 ESPAsyncWebServer Guide – คู่มือสร้าง Web Server แบบไม่ต้องรีเฟรช
ตัวอย่างโค้ดในหน้านี้ เป็นเวอร์ชันใช้งานจริงผ่าน `WiFiServer` สำหรับมือใหม่ที่ต้องการเริ่มต้นควบคุม GPIO ผ่าน Web UI
ตัวอย่าง Code ดาวน์โหลดที่ลิงก์ :
ก่อนจะเริ่มทำโปรเจกต์ ลองไปทำความรู้จัก ESP32 และฟีเจอร์เด่นที่คุณควรรู้ กันก่อน
กรุณา เข้าสู่ระบบ เพื่อดาวน์โหลด
ดูวิดีโอสอนโค้ดตัวอย่างนี้แบบละเอียดได้ที่นี่:
โค้ดตัวอย่าง:
/*
  Devadiy
*/
// Load Wi-Fi library
#include <WiFi.h>

// id และ password WIFI
const char* ssid = "your ssid";
const char* password = "your pass";

// ตั้งค่าพอร์ทเชื่อมต่อ เซอร์เวอร์ 80
WiFiServer server(80);

// ตัวแปรเก็บค่า Request url Header
String header;

// Auxiliar variables to store the current output state
String gpio26State = "off";

// Assign output variables to GPIO pins
const int output26 = 26;

void setup() {
  Serial.begin(115200);

  // กำหนดตัวแปร Output
  pinMode(output26, OUTPUT);

  // กำหนด Output สถานะ LOW
  digitalWrite(output26, LOW);

  // เชื่อมต่อ WIFI ด้วย SSID และ password
  Serial.print("Connecting to ");
  Serial.println(ssid);
  WiFi.begin(ssid, password);
  while (WiFi.status() != WL_CONNECTED) {
    delay(500);
    Serial.print(".");
  }

  // แสดง IP address Local Network
  Serial.println("");
  Serial.println("WiFi connected.");
  Serial.println("IP address: ");
  Serial.println(WiFi.localIP());
  server.begin();
}

void loop() {
  WiFiClient client = server.available(); // Listen for incoming clients

  if (client) { // If a new client connects
    Serial.println("New Client.");
    String currentLine = "";
    while (client.connected()) {
      if (client.available()) {
        char c = client.read();
        Serial.write(c);
        header += c;
        if (c == '\n') {
          if (currentLine.length() == 0) {
            // Response HTTP
            client.println("HTTP/1.1 200 OK");
            client.println("Content-type:text/html");
            client.println("Connection: close");
            client.println();

            // เปิด ปิด LED
            if (header.indexOf("GET /26/on") >= 0) {
              Serial.println("GPIO 26 on");
              gpio26State = "on";
              digitalWrite(output26, HIGH);
            }
            else if (header.indexOf("GET /26/off") >= 0) {
              Serial.println("GPIO 26 off");
              gpio26State = "off";
              digitalWrite(output26, LOW);
            }

            // Display the HTML web page
            client.println("<!DOCTYPE html><html>");
            client.println("<head><meta charset=\"utf-8\">");
            client.println("<style>html { font-family: Helvetica; display: inline-block; margin: 0px auto; text-align: center;}");
            client.println(".button { background-color: #4CAF50; border: none; color: white; padding: 16px 40px;");
            client.println("text-decoration: none; font-size: 30px; margin: 2px; cursor: pointer;}");
            client.println(".button2 {background-color: #555555;}</style></head>");

            // Web Page Heading
            client.println("<body><h1>ควบคุมการเปิด ปิดหลอดไฟผ่าน WiFi</h1>");

            // Display current state
            client.println("<p>สถานะหลอดไฟที่1 " + gpio26State + "</p>");

            // If the output26State is on → show OFF button
            if (gpio26State == "on") {
              client.println("<p><a href=\"/26/off\"><button class=\"button\">OFF</button></a></p>");
            } else {
              client.println("<p><a href=\"/26/on\"><button class=\"button\">ON</button></a></p>");
            }

            client.println("</body></html>");

            client.println();
            break;
          } else {
            currentLine = "";
          }
        } else if (c != '\r') {
          currentLine += c;
        }
      }
    }
    header = "";
    client.stop();
    Serial.println("Client disconnected.");
    Serial.println("");
  }
}
เรียนรู้การติดตั้งใช้งาน Arduino IDE ตั้งแต่พื้นฐานไปจนถึงขั้นสูง ที่นี่เลย: Arduino IDE Guide
Deva DIY หวังว่าบทความนี้จะเป็นประโยชน์ในโครงงานของคุณ